Length of Backswing Check

Happy February! January flew by of course but I am trying to stay on top of my tips for you this year. Therefore, here is your new blog for February 2024!

Let’s talk about something you all can do during those wintry days inside or outside! All you need is a bungee cord. Don’t worry if you don’t have one I am sure you can find something around the house such as a tension band, string, or even an alignment stick might work. Next step, find somewhere were you can tie each end to something such as columns, trees, etc. You are trying to make a line. Check out the video below to assist you. Next, pick which shot you want to practice: Full swing, pitching at 3/4, 1/2, 1/4 etc., or chipping. Place your string at the level you want to your backswing to stop. Place your body in the appropriate line to take that back swing. You might have to move around for the different lengths of swing so the club hits the cord. Then start your practice. Try not to hit the cord. When you are swinging start to feel the appropriate muscles you are using to ensure this type of backswing. These feelings should be more in your shoulders, core, and legs. Not your elbows and wrists.

Once you find this amazing space to practice it is an easy setup every time! Plus it can be used to practice various shots. It’s a win for your entire game!

Grip Pressure

This is one of the hardest parts of golf to teach. We all want to strangle the club to death to make sure the club does what we want it to do. Unfortunately, this actually does the exact opposite affect. When we hold the club too tight we make the club shaft stiffer and the club doesn’t do what it is suppose to do. It is very similar to playing a tambourine. Yes, a tambourine! It is the music instrument that when you hold it and shake it it plays music through the vibration. But if you hold the tambourine too tight it doesn’t have the vibration and the music is not very nice. The club itself has to have some wiggle to create lag to create the power the club provides. When you grip it too tight, the club can not lag and can not create power.

So instead of us asking ourselves are we gripping the club too tight. Grab a tube of toothpaste, take the cap off, and point it down at the ground with your golf grip and stance. Swing! Did any toothpaste come out? If it did, when did it come out? At the top of your swing? Impact? How can you fix it. Instead of gripping tight, try to put that pressure somewhere else…..shoulders….hips….etc.

Check out the video and see if I showed good grip pressure or not!

Distance Control Practice Drill

Hi! I have had a lot students asking for some good practice drills lately. This drill is actually one of my favorites!

We start by chipping a ball about 5 yards away. A good short chip…remember no hips. Then our second ball we take and chip a little farther away. The third ball you do the same thing. You start creating a line with balls down the driving range. Eventually you will have to transition to a pitch shop using your hips to get the ball farther. Then continuing using your hips and taking longer and longer swings. Count how many balls are in your line. The closer the balls are together, the better distance control you have, and can continue to add more balls to your line. You literally can do this drill all the way through your bag. Working on getting the ball farther and farther while controlling the distance during the drill.

On a second note you can also notice my shots are in a straight line. The second part of this drill is working on your extension with your club. When you are swinging you are ensuring that the clubface is moving down the line towards your target for clean contact.

Check out the Video:

Stay at Home Short Game Practice

We don’t have to quit practice even if we are at home. This just means that we have to find creative ways to practice! I grabbed some stuff around the house and created a little short game practice in my back yard. It is not a super huge back yard but the way I can manage this is with different kinds of golf balls and my wedges.

1. Whiffle Balls: Great Pitching practice with all my wedges. The ball doesn’t go real far but I can take big swings and the ball produces the great loft for pitching

2. Foam Balls: Foam balls are great for Pitching farther and a little bit of chipping to see the ball roll a little. Plus the ball is a little denser so it feels more like a golf ball at contact.

3. Golf Balls: These are great for chipping practice to see the ball roll through the grass and also work a little bit on pitching with my Lob Wedge and even my Sand Wedge. Takes some control but with practice it isn’t too dangerous!

Now that I have my golf balls and clubs, I set up different areas to hit. I definitely wanted a towel so I could roll onto it when chipping. I picked a bucket to pitch in. Then I picked the swimming pool to chip and pitch into with an extra bonus garbage can for the very middle. Also, I could use the swimming pool as a pretend lake to hit over to any of my targets!!! Yes, it is time to get creative and have some fun.

Let your kids play too. My kid loves it too. We actually made our targets have points and we add them all up at the end to see who wins.  I am still winning but the more we are on the “Stay at Home” I can see him catching me soon!

Putter Stroke Practice

Yes, we are going to use a box to help improve our putter stroke! This drill is going to help the putter stay straight back and straight through the stroke. The box has walls to stop you from making bad moves with your wrists. I prefer a golf club box because the putters fit right in without having to do too much cutting. I used two paper clips with tabs on them to help guide the length of my stroke. Last,  I cut a hole at one end of the box so that the golf ball can go through the box. Check out the video to see it in action!

This is a great practice for home, office, or you can even take it with you to the course. Also, if you have kids or grandkids, I am sure they would love to help you decorate it! Don’t forget to check out the chalk line blog to continue your great putter practice.

Determining Pitching Yardages

Following my last post of different wedges in your bag, I now would like to discuss how you can put these wedges into play. The drawing above includes my 4 wedges in my bag: Pitching Wedge (PW), Gap Wedge (GW), Sand Wedge (SW), and Lob Wedge (LW) and the specific lofts of the clubs from the manufacturer. As you notice each wedge is around 4 degrees difference therefore my wedges will be around 10-15 yards difference between the clubs. I then proceeded to write at the top of each circle approximately the average distance each club goes in my bag. I like to round to nearest tenth for my purposes but you can figure out what you specifically like to do on your own.

Now for some math! In order to figure out the rest you take the full swing yardage (at the top of each circle and start dividing. Again, I like to pitch using 1/4, 1/2, and 3/4. These best suit my swing. But you can also determine 1/3, 2/3, etc.

For instance my Pitching Wedge:

Full Swing: 100yds

3/4: What is 3/4 of 100 = 75

1/2: What is 1/2 of 100 = 50

1/4: What is 1/4 of 100 = 25

I do this for all my wedges. Now I have a chart of all the distances my wedges can go. After this chart is complete, I can go out on the range, using my range finder and find different distances. Once I choose my distances I can look at my chart and start hitting various pitch shots to each distance.

Pitching Wedge, Gap Wedge, Sand Wedge, Lob Wedge OH MY!

How many wedges should you have in your bag? Why do you have so many wedges? Why don’t you have so many wedges? What do all these wedges do? Do I need another wedge for Christmas? These are the questions I am going to answer!

Most people start with two wedges: a Pitching Wedge and a Sand Wedge. Let’s talk about these first. A Pitching Wedge has a average loft of 46 degrees and a Sand Wedge has an average loft of 56 degrees. These means that the Sand Wedge will go higher and land with less roll than a Pitching Wedge because theRe is more loft. Therefore the Pitching Wedge will go a little lower and a have a little more roll. A lot of golfers would be fine with just having these two wedges.

But when it comes to pitching and or bunker play you will want to add another wedge. There are two more options.

A wedge that has higher loft such as a Lob Wedge. A Lob Wedge’s average loft is 60 degrees. This means it will go higher than a Sand Wedge and have very little roll when it lands because it is traveling higher. This club is very useful out of the bunker or used for pitching when having to stop the ball on the green faster.

The last club to add is called a Gap Wedge. This club is actually a club that fills your “gap” between a PW and a SW. There is Usually a 10 degree gap between these clubs and for some golfers it is too big of a gap. Most golfers prefer to have 4-5 degrees difference in their clubs. Therefore you buy a Gap Wedge to fit in between such as a 50 or 52 degree Wedge. Let’s say your PW goes 100 yards and your SW goes 80 yards. That is a 20 yard gap and to trying to reach 90 yards might be a little harder so you add a Gap Wedge to help. Check out my Determining Loft blog to see what Gap Wedge would fit for you.

*Check out Yardage Control Blog and Determining Loft of Club Blog for more information to help! Plus next blog Pitching Yardages to continue our Gap Wedge conversation!

Using the Golf Ball to Improve Your Putting

People think that using a line on your ball to help align your putts is “cheating.” In my opinion, I don’t know why you wouldn’t use a line to help aim your putts. It is easy, defined, and can only help you putt better.

I posted a picture to show you different ways to put a line on your golf ball. You may use different colors: such as a red or orange if you have a hard time seeing the line from a distance. There are also gadgets you can buy to help draw the perfect line if you need assistance. Also, check out the ball you use or look for a different ball that actually has a line on the golf ball. I think it is great that the top golf balls such as Titleist, Callaway, and Bridgestone actually put arrows or lines on their golf balls to assist you.

Now, you actually have to use this line. Remember you need to put your ballmarker down first in order to pick your golf ball up and put your line towards your target (check out the video I attached to see how to do to this). Once your ballmarker is in place, put your line towards your “target”. “Target” meaning where you want the ball to roll. If you are playing the ball to break to the left, you will place the ball aiming towards the right of the hole. This ensures you are not aiming at the hole and guiding the ball when you putt. Also, it helps define your aim and mentally commit to your putt. Do this on every single putt to make a good consistent routine!

Have fun drawing the lines and making it your own! Practice this routine on every putt and it will not effect your pace of play!

Golf Balls!?

Titleist, Callaway, Taylor Made……What!!!! There are so many choices out there these days. It is very hard for any golfer to make the correct choice. Let me help you out!

As a beginner golfer, truly it doesn’t matter, yet. The cheaper the ball maybe the better for a little bit.

But then, all of sudden you turn a corner and start to say to yourself “Why does my ball always roll past the pin and over the green?” This is the point when you must start to look at what a golf ball can do for you. Now, I can’t tell you brand or kind because truly most of them out there are great golf balls. I am going to be very basic here. Most companies have three lines of golf balls with three different price points. You can go on their websites and read all the information they have. But to tell you the truth it can be a little overwhelming with all the technology out there. But again it is good to do. Another great place is to look on the package of the golf ball. Most of the time the package can give you the basic attributes of the golf ball.  But reading and learning about the golf balls can only go so far. At best it can only get you to the point where you are looking at a couple companies or one specific ball category……

But now you have to try them out.  It is just like a science experiment. Pick three different golf balls (brand, category, price etc.). Go to the practice green. Chip all three to the same flag from the same place. What happened? Did one feel better than the next? Did one react better? Go get them and try it again? What happened?! Next do a different shot, maybe a longer or shorter chip. Then try a pitch. Spend about 20 minutes just trying all of them out. At the end, what do you think?

As your game improves, so should the decision you make when buying golf balls. If you are playing a distance golf ball and can’t hold a green. This could help you out. Yes, it might be the golf ball.


Controlling Your Distance When Chipping

Now, remember what a Chip Shot is: a ball that hops and rolls! Once you have practiced your basic chip shot and have the stroke fairly comfortable and “consistent”. It is now time to go practice your distance control to get the ball can get close to the hole.  There are three ways to control your distance when you are chipping:

1. Length of swing: Remember the chip shot is using just your shoulders. So therefore you can only swing as big as your shoulders can take you which is about 1/4 of a swing or less. This is meant to be a small precise swing – so make sure to keep it this way!

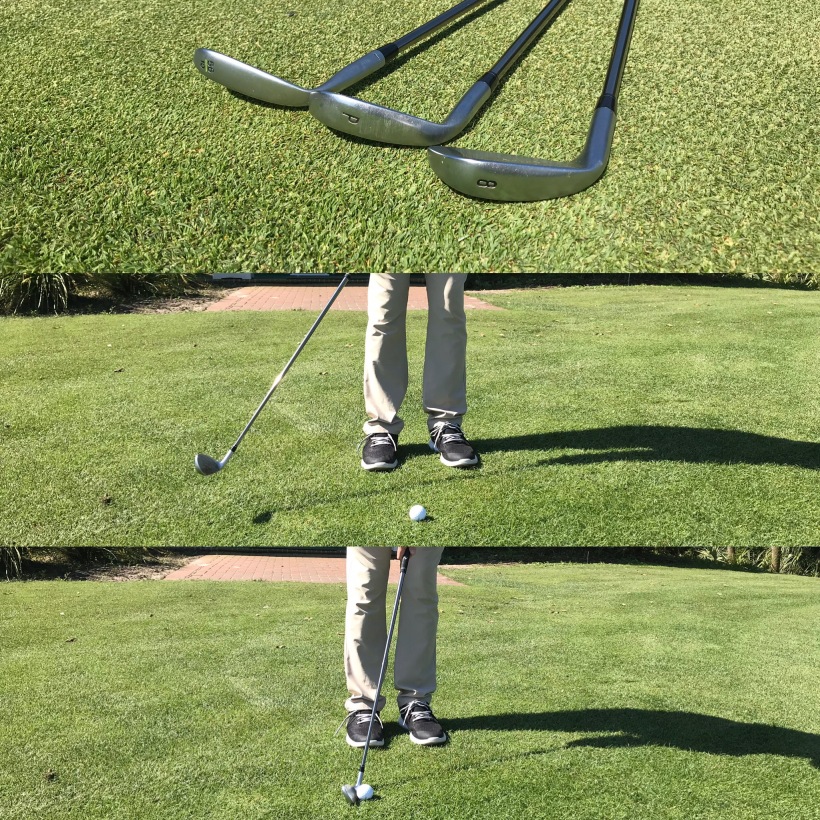
2. Club Selection: I would personally only choose 2-3 clubs to provide accurate distance length. More than this can be quite confusing. My suggestion is:

  •  Sand Wedge: Short shots with the littlest amount of roll
  • Pitching Wedge: Medium Shots that will provide more roll
  • Longer Iron such as a 9 or 8 iron: Long shots that will provide a lot of roll

3. Ball Position: Changing ball position can help with getting the ball even closer to the hole when the first two options aren’t quite getting you close enough

  • Middle Ball position will give you loft and roll
  • Back Ball Position will give you less loft and more roll
    • This ball position is basically what we know as a Bump and Run Shot

            **Check out my previous blog about Back Ball position for more information

After you have understood how all three of these things. It is time to go to the practice green and try it all out. My suggestion on practicing is grabbing 3-5 golf balls and pick one flag on the green as your target. Take the first ball and go with your first instinct. What club, what length of  swing, and what ball position – then execute the shot. Take a minute after you hit the ball and check it out. Where did it go? What can you fix: stroke, distance, direction. Then take the second ball, change something and see if it worked. Grab the third ball etc. After about 5 balls, you should have a good idea on what worked and what didn’t. Go pick them up and go to another spot or another hole. What we are trying to accomplish is working on your first instinct and choosing the proper tools first to get it right next to the hole to walk away with a one putt! Practice Practice Practice!