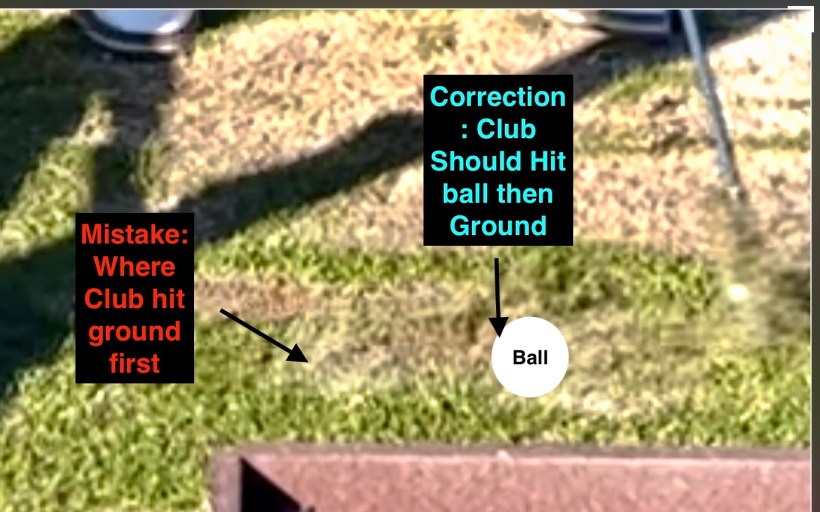
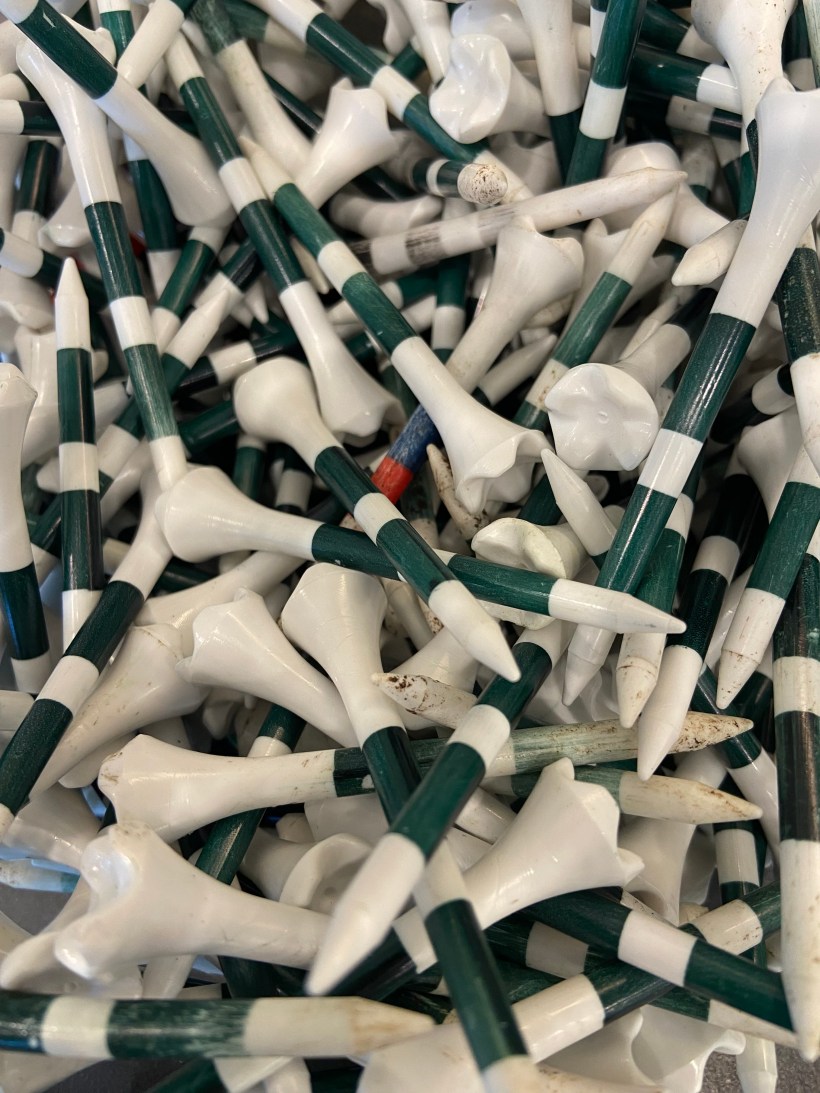
Length of Backswing Check

Happy February! January flew by of course but I am trying to stay on top of my tips for you this year. Therefore, here is your new blog for February 2024!

Let’s talk about something you all can do during those wintry days inside or outside! All you need is a bungee cord. Don’t worry if you don’t have one I am sure you can find something around the house such as a tension band, string, or even an alignment stick might work. Next step, find somewhere were you can tie each end to something such as columns, trees, etc. You are trying to make a line. Check out the video below to assist you. Next, pick which shot you want to practice: Full swing, pitching at 3/4, 1/2, 1/4 etc., or chipping. Place your string at the level you want to your backswing to stop. Place your body in the appropriate line to take that back swing. You might have to move around for the different lengths of swing so the club hits the cord. Then start your practice. Try not to hit the cord. When you are swinging start to feel the appropriate muscles you are using to ensure this type of backswing. These feelings should be more in your shoulders, core, and legs. Not your elbows and wrists.

Once you find this amazing space to practice it is an easy setup every time! Plus it can be used to practice various shots. It’s a win for your entire game!

Ugh, I hit the ground before the ball!

Don’t worry about hitting the ground. That is why we have a Superintendent. His job is to fix the grass that you hit. If you didn’t hit the grass, he wouldn’t have a job…..and yes he needs a job. But I wouldn’t be a descent instructor if I didn’t teach you how to hit the ball then the grass!

Usually, the reason you hit the ground before the ball is that you have NOT moved forward towards the ball ENOUGH on your down swing. Now, we should know that on our downswing our hips should move first, then our shoulders, then our hands, then the club. But if the club hits the ground first, then your motion is not in the right order. Such as the opposite order: hands, shoulders, and possibly even no hip turn. Or possibly you have the right timing but you haven’t moved your hips enough forward when swinging through. Therefore the ground gets in the way.

Here is a video to watch that includes a great drill. I would explain the drill but the video really shows you exactly what to do. If you do not have an alignment stick, you can use your club too!

Beginner Golf Clubs?

What clubs does a beginner golf club need to start with? Well this is a hard question for many reasons.

First Question: Should the student buy a set of golf clubs? I always compare this to a gym membership. If I purchase a gym membership will this entice me to go more. Probably yes, but there is always the gym membership that we use for the first month and then it just sits there. Golf clubs could be the same way. But, the good thing about golf clubs is you can use them for at least a couple years if not more. In the end if you are able to buy a set, I believe you should. I feel like it is a bit of a waste to keep renting clubs over and over again. Plus, it is a great feeling to learn to hit with your own clubs.

Second Question: What clubs should the student buy? As always, I believe a budget is where most people should begin. There are some fabulous golf clubs out there but you will definitely pay for them. If you are willing to pay for them, that is great and you can. But as a beginner is that the correct way to go? I believe beginners should start with a good set to get them started. I suggest walking into a golf store (leaving your wallet in the car) and looking around. Try some clubs. What do you feel? What do you like? What is being offered? Do you have an opinion?

My Opinion: Usually there are sets of clubs which include 12 clubs that are prepackaged. These are great for beginners. It gives you everything you need all in one box! Now, stick with golf brands such as Callaway, Ping, Taylor Made etc. This is the best choice in my opinion. It is the happy medium. You get plenty of clubs to use, descent technology, and a fairly affordable price. As a beginner, the students doesn’t know what a great club is compared to a good club. Which is fine. It will take a year or two to determine this. Therefore this is why the prepackaged sets are a great beginning to your golf game!

Complete Power Connection in Your Swing

My students are asking how to gain more distance in their golf swings. First, maximum power comes from your hips and your shoulders. But your hips have to be connected with your shoulders and the club long enough to get this maximum power. What does that connection feel like? How long through impact must this connection stay? Here is a drill you can practice to help you understand if your swing is making this happen:

First take a ball and any club (preferably an iron to begin). Set up to the golf ball. DO NOT TAKE A BACK SWING. Start with your hips first to push the ball forward a bit. Then extend your shoulders to the target making the club face push the ball forward. If you stay connected the ball will go forward towards your target. Stay connected to see how far you need to move your body to keep the ball on your target line. If you do not stay connected the club face will twist which will make the ball go in the wrong direction. If this happens you lost your connection. Really focus on keeping your hips, shoulders, and club together as one unit. The feeling should be strong in your core instead of your forearms and wrists.

How did it go? Could you feel stronger moving through you shot? How long did you have to stay connected? The strength of your core is staying connected through impact and is keeping connected to your target. Welcome to maximum power!

Check out my video to see how I practiced this drill!

Golf Books….

There are so many books on golf: instruction, mental, biographies, history, etc. What books should we read? My answer is read anything! I took a picture of my top 3 books. Of course two are mental because it is my favorite topic of golf to read. It really does help me not freak out on the golf course. Plus, I received Annika’s book a very long time ago. It is a great picture book about the pure basics of golf. Before I had a child, I left it out on my coffee table and everybody loved to take a peak! I am hoping for the book to make it back to the coffee table, I believe the kids are getting old enough now that the book will be safe from those sticky, nasty fingers…hahaha!

Some other favorites are Bob Rotella’s Golf is Not a Game of Perfect, any of Vision 54 books by Lynn Marriott and Pia Nilsson, The Match and The Greatest Game Every Played by Mark Frost.

I would love to hear about what golf books you like to read or suggest! Email me, Facebook, Instagram etc. I think we would all love to hear all the great books out there!

Grip Pressure

This is one of the hardest parts of golf to teach. We all want to strangle the club to death to make sure the club does what we want it to do. Unfortunately, this actually does the exact opposite affect. When we hold the club too tight we make the club shaft stiffer and the club doesn’t do what it is suppose to do. It is very similar to playing a tambourine. Yes, a tambourine! It is the music instrument that when you hold it and shake it it plays music through the vibration. But if you hold the tambourine too tight it doesn’t have the vibration and the music is not very nice. The club itself has to have some wiggle to create lag to create the power the club provides. When you grip it too tight, the club can not lag and can not create power.

So instead of us asking ourselves are we gripping the club too tight. Grab a tube of toothpaste, take the cap off, and point it down at the ground with your golf grip and stance. Swing! Did any toothpaste come out? If it did, when did it come out? At the top of your swing? Impact? How can you fix it. Instead of gripping tight, try to put that pressure somewhere else…..shoulders….hips….etc.

Check out the video and see if I showed good grip pressure or not!

What we can learn by watching the Pros!

Do you like to watch golf on TV? I am not a huge fan, but my husband is! He watches the tournaments every week. He will call me into the room when they slow a golfers swing down…..this is my favorite part! They are truly amazing at what they do when they swing a golf club. When they slow it down on TV it actually gives all of us a chance to really see the different parts of the golf swing.

First I look at their setup: Posture is nice and straight, knees slightly bent, front arm straight.

Next is the backswing: How they use their front shoulder to take the club back on plane, with their front arm straight and back arm relaxed, the toe of the club pointing up.

The Top of the Swing: They rarely over swing, the front arm staying straight, shoulder under chin, body so strong and coiled

Now the Downswing: The HIP TURN IS CRAZY! They start their hips first and then their arms just follow allowing gravity to take over.

Impact: The clubface is square, the hips are moving towards the target, and the front arm is still straight!

Past Impact: The CLUB IS STILL EXTENDING to the Target, the arms are still straight, the hips are still turning!

The Finish: Look at how high the arms are finishing above their head!

THESE PROFESSIONALS ARE AMAZING!

Now we are not professionals, but if we are going to look at or mimic anyone it should be the people that make the big bucks in this game. We can learn a lot from them!/

Distance Control Practice Drill

Hi! I have had a lot students asking for some good practice drills lately. This drill is actually one of my favorites!

We start by chipping a ball about 5 yards away. A good short chip…remember no hips. Then our second ball we take and chip a little farther away. The third ball you do the same thing. You start creating a line with balls down the driving range. Eventually you will have to transition to a pitch shop using your hips to get the ball farther. Then continuing using your hips and taking longer and longer swings. Count how many balls are in your line. The closer the balls are together, the better distance control you have, and can continue to add more balls to your line. You literally can do this drill all the way through your bag. Working on getting the ball farther and farther while controlling the distance during the drill.

On a second note you can also notice my shots are in a straight line. The second part of this drill is working on your extension with your club. When you are swinging you are ensuring that the clubface is moving down the line towards your target for clean contact.

Check out the Video:

Understanding your Path/Plane of your Golf Swing

A golfer’s swing path is a very different feeling compared to the path of a tennis or baseball player. Most people are used to swinging horizontally around their bodies to hit a ball. In golf, the ball is stationary on the ground. Therefore a golfer has to learn to swing more vertically to make the club go up so that the club comes down on the ball. Then to remember after hitting the ball to continue to go out and then up instead of going around horizontally again. When you have the correct swing plane it will ensure that your club will be hitting down properly on the golf ball and the club face will square up to compress the ball properly. Students sometimes will have a good backswing plane and then reroute the swing on a different path through the ball. It is always good to check your backswing plane first because this can effect the downswing and follow through. After a good backswing plane, then check the downswing plane, and then the follow through plane.

The video and picture is of our Explanar at the Learning Center. This shows the correct plane for a golfer. It is a great way to visual what your plane looks like and also lets you feel the path that your club should go on. Hopefully you can come to the Learning Center one day at Kiawah Island Golf Resort and check it out yourself!

Also check out my previous blog called: Ensure Your Swing is Starting on Plane. This blog will teach you how to use a wall to help you with your swing plane too.

Finding Your Front Shoulder Connection

If you have ever been taught by me, you will understand how important I believe your front shoulder a major key to making more consistent contact with your golf ball. This blog is here to help you make sure you are using your front shoulder. Lots of us believe that we are utilizing our shoulder correctly but when it comes down to it most of us are not. If you are having some inconsistencies this is a good place to start. Most students are relying on their forearms and wrists to swing their golf club, which can cause your club face to twist and turn too much and lead to inconsistencies.

First take your club and setup to a golf ball. Then stand up from your posture and lift the club up only using your front arm. Your front arm from your hand to your shoulder should be in line with each other. If you do this properly you should feel the strength of you shoulder holding the club up. If you do not feel this check the alignment of your arm. Are there any breaks in your arm? How does your grip strength feel? Too Tight? RELAX!!!

Once you have found that amazing connection, set up to your golf ball again and feel the connection you have with your golf club and your body! Doesn’t it feel stronger and more connected! Congrats – welcome to a new stronger setup!