Buying Kid’s Clubs

Christmas is right around the corner, so I thought we could discuss how to purchase a child a set of golf clubs. This process is realitively simple but very important. You want your child to have the right size clubs so they have a better chance of hitting the ball correctly.  It is important to check your child’s clubs every year, especially since the kids tend to grow every month it seems.

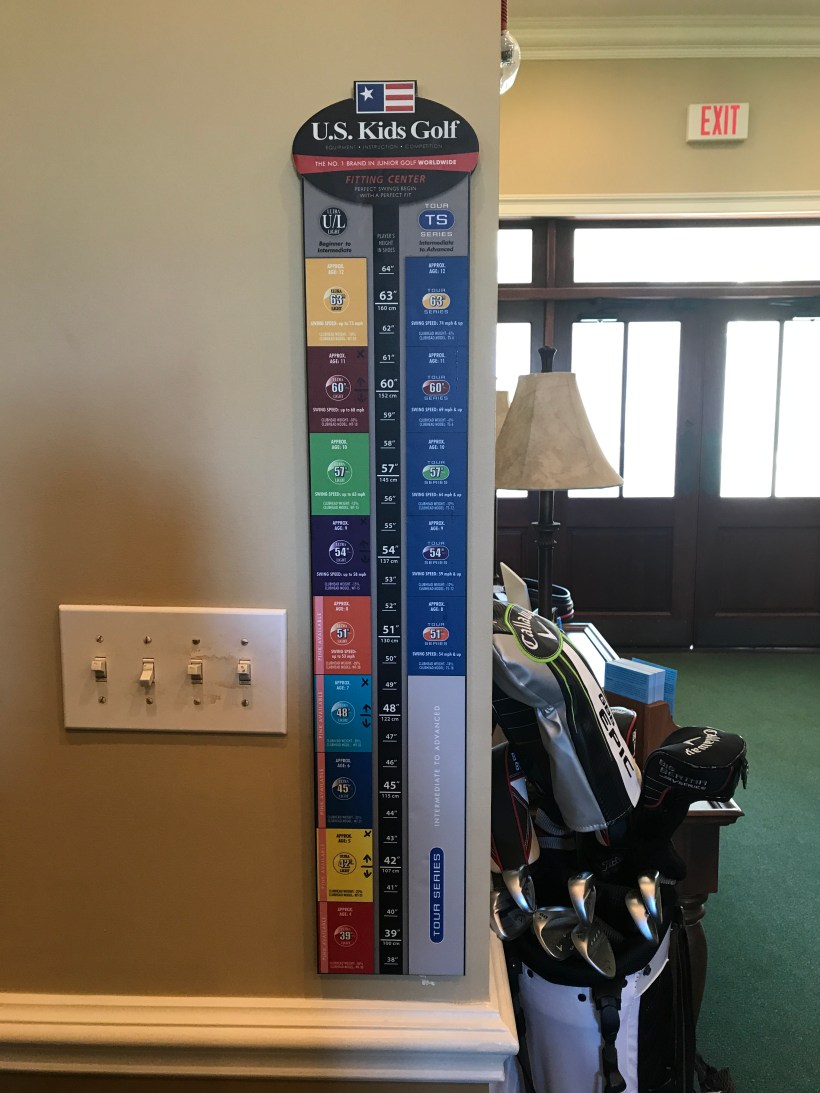
If you look at the chart above, you will notice it is based on height and not age. This is extremely important because a child at the age of 8 might not be the same height as another child at the age of 8.  U.S. Kids does a very good job at sizing every child properly. They have simplified the process by applying a color code to a range in height. For example if your child is 45 inches tall he would be in the blue clubs. If your child is 49 inches he/she would be in the orange clubs. Now, if they are in the color orange, this doesn’t mean you think your child is still growing and should buy purple the next color up. You want the child to be in the correct set, and this means you should buy the orange set. But if you are on the border, look at your child and his/her abilities.

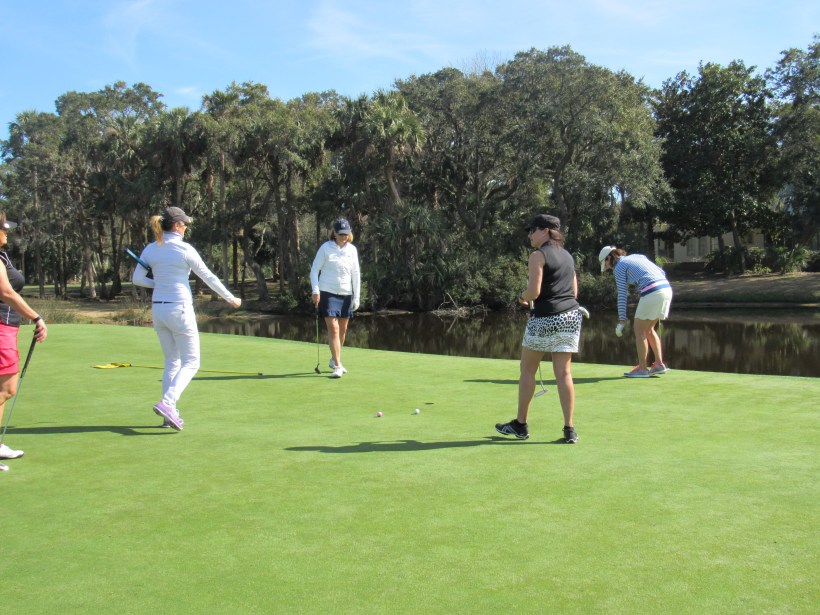
Another great option for a child just beginning or thinking of beginning is going out to buy individual clubs. My suggestion is purchase at least a putter and 8 iron. These two clubs can get them started. If you choose to buy a third a hybrid is a great choice. The hybrid can be used to hit off the tee box and also to hit off the fairway and is generally an easier club to hit longer shots with. These three clubs any kid can take to the course.


Yardages Control

When you play a golf course it is always good to know how they mark the yardage’s on the golf courses. Players have chosen for helping determine a holes yardage’s. Some golf courses uses stones to mark 100, 150, 200 etc. Other golf courses just mark 150 yards with a stick. While others go and mark the sprinkler heads.  Another option is using a range finder or gps. When you know how the golf courses are marked then you can start to determine where you are on each hole and what club to choose.

Now, depending on the type of player you are the yardage can mean different things. If you look at the picture above, I marked an X where the ball has landed and written the yardage to the hole: 50 yards. Most of us would take out our 50 yard shot and hit the ball. But what we are not accounting for is including the yardage of the ball after it hits the ground. When I am teaching a player on the golf course, I am noticing the students are hitting a 50 yard shot but when the ball lands it will roll more and either roll to far past the hole or even over the green. Then they look at me and said I hit the right shot but it didn’t work. While, they are not accounting for the extra distance when the ball lands. Therefore, if they took a PW and hit a 50 yard shot, the ball will roll at least 10-20 more feet if not more. Therefore they should be landing the ball either in the front of the green or the middle of the green. Therefore the player should be landing the ball at 30 or 40 yards and letting the ball roll to the hole. Each player has to determine their own yardage by including these three factors: the performance of the club, how the ball will react, and the condition of the golf course.

1st Checkpoint for Ensuring Proper Loft

As a teacher we begin to check our student’s swing through grip and setup. The first major checkpoint is the location of club face as the student transition to the backswing. This position can effect your entire golf swing. If the club face is not setting properly it is very hard to get the club face back to square at impact.

I took a picture of the correct positioning. Look at the club face (flat part of the head) is facing forward. The toe of the club (the top of the head) is pointing up and the heel (the bottom part of the head) is pointing down. This starts the club face properly, which ensures you are using your shoulders to swing back and not your hands and wrists.  Therefore, you are starting with a club face that can now get set for a good backswing and hopefully a better club face at impact.

Personal Par

So sorry for the lapse in posts, but it has been a couple of crazy weeks. Irma came through the south and luckily we survived here in the low country. Our thoughts and prayers go out to everyone that has been effected and hope they can get back into the swing of things sooner than later.

As we have watched golf on TV, even the professionals have a hard time shooting par. Therefore this blog is about shooting your personal par. Even though, our ultimate goal is shooting par, it takes time, practice, and patience to lower your score.

Take your scorecard of the course you are going to play and change your par. If you look at the picture above, I have changed a couple holes to bogey because I feel that these holes give my student a little trouble and if he/she had an extra stroke, it would ease their mind and allow the student to play the hole their own way. After I change the par, his/her goal is to shoot 80 which is a great goal for him/her right now. This is all about de-stressing yourself while you play. If a hole is too long and you have trouble getting to the green in 2 shots, then allow yourself an extra shot. Who knows, in the end, you might not need the extra stroke after all. Plus, this hopefully will also allow yourself to avoid getting a double bogey or more because you are so worried about shooting par. After a couple rounds, then you might want to change your personal par a little lower to challenge yourself.

There are many different forms of this personal par, such as playing 5’s: every whole is a 5 and if you get a 5 on every whole you shoot a 90. Another way is just add an extra stroke to each hole – bogey golf = 90 on 18 holes. I personally have done this my whole career. It has helped me and my students start to shoot lower without overwhelming yourself with shooting the “professional par”.

“The Grip”

One of the hardest things for me to teach any student is to hold your golf club properly with little pressure. Most golfers, including myself, grip the club to “death”. When we do this, the club becomes stiff and changes the dynamic of the golf club. It is very similar to holding a tambourine. When you hold the tambourine tight and shake it, the tambourine does not sound proper- it is clunky and short. Now if you hold it gently and shake it plays its proper music. A correct grip pressure is light and relaxed. Some people say it is like holding a baby bird, a full tube of toothpaste, or a shopping bag/ briefcase.  I promise you will not throw the club if you do this, providing the grips are in good condition.

Now, we can look at our grips to help us aid in not holding it tight. Especially as the summer comes to an end, it is time to check your grips. If you see the picture above, this is a worn out grip. This can effect your grip pressure tremendously. A worn out grip has no grip left- the sticky stuff. When this happens you will have to grip tighter just because your grips are worn. Especially after a hot summer, our grips can get slippery from our hands. First, you can wash your grips to clean all the sweat, dirt, etc. off of them. Take your kitchen dish soap and a good scrub brush. Put your grips under the running water and with soap scrub them until the water turns a lighter grey and set them on a towel to dry over night. By the morning if your grips are still in good condition they should feel better so you do not have to grip as tight.  If they are not better or have worn spots like the picture above it is time get new grips, which most golf shops can do for you in less than a day.

Improve your Sand Shot

First of all, you need to practice your sand shot. Yes, I understand if you don’t go in the bunker, you don’t need to practice it. But if you practice your bunker shot and learn to enjoy it, you won’t have to worry about being in the bunker….you might even like to be in the bunker.

How to practice: The above picture shows and line going vertical from the inside of my left foot out behind the ball. This line signifies where to hit the sand. Now, the top divot is a correct divot, a couple inches behind the ball.  The bottom divot is a common divot but a wrong divot – taking too much sand therefore not getting the ball out of the bunker. Instead of thinking where to hit the sand, think about moving your hips through to the target, just like a pitch shot or a full swing shot. If you don’t clear your hips, you won’t get the ball out and you will take the bottom divot every time. If you clear your hip by transferring your weight, your divot will be closer to the ball and your ball will get out of the bunker.

Ensuring your swing is starting on “Plane”

If you ever have played with me this is my drill of choice to improve my swing. I have always been a flat plane swinger (I love playing softball)! You will find me doing this before every round of golf I play for a couple minutes.

For those who do not know what “plane” means the definition is the path that your club swings on. Most people are so used to playing softball, tennis, racquetball etc. Most common swings in various sports are horizontal swings with the ball in mid air. Golf is not like these sports. The ball is on the ground, therefore we must swing a little more vertical so that our club goes up and then “what goes up must come down” and hit the ball. To ensure you are starting your swing on plane stand up with your butt brushing against a wall (a wall you can hit and not damage or don’t mind it gets damaged a little). Then get in your setup position with club. Swing back halfway. Your club on the backswing should not hit the wall at all, and technically should be parallel to the wall. If you have hit the wall anywhere you are not taking your club back on plane.  I love this drill because you can keep your eye on the wall and feel what the backswing should feel like. If you hit the wall, you will feel it is wrong and be able to try to fix it without technically having to look at it.

Stay tuned for future blog on how the wall can help you follow through better too!

Women’s Mini Golf Escape

We are so excited to announce our Women’s Mini Golf Escape dates for Fall 2017! It will be a a maximum of 12 students for each event; 4:1 Student to Teacher Ratio.
Available Dates: September 15-16, and October 27-28, 2017.

These events are near and dear to my heart. I love to meet all the women that are so excited about the game and ready to learn. The two days go by fast but are fun and packed with great tips to help the intermediate play better golf.
2 Day Event:

  • 3 Hours of Golf Instruction on Driving Range Each Day
  • 2 Lunches
  • 9 Hole Playing Lesson with personal Golf Instructor each day (may play back 9 on own)
  • 18 Hole of Golf on Turtle Point Golf Course & Osprey Point Golf Course
  • Special Event Gift                                                          **Accommodations not included

For more information call the Tommy Cuthbert Learning Center (843) 266-4030 to book. Or email Abby Welch at abby_welch@kiawahresort.com.


Pitching vs. Chipping

If you have ever taken a lesson with me you will understand that knowing the difference between a chip and a pitch is very important. When my students are playing golf I stress the importance of knowing which shot you are going to execute. There is no such thing as a “chitch” (doing a pitch and a chip in the same swing)….this will not be a produce a consistent shot.

Definition:

A Chip shot is a shot that has little loft and more roll **(similar to a chipmunk: he hops and runs)

A Pitch shot is a shot that has more loft and little roll **(similar to a softball pitch where the ball has to get to home plate in the air)

Now as far as the swing:

A Chip shot you use just your shoulders to move your arms, your lower body does not move. It is just like a putt, but you are using a different club!

A Pitch shot you use your shoulders (just like a chip) but you add your hips. It is just like your full swing but shortened in your back swing.

As far as distance control:

A Chip Shot is anywhere from the ball to a 1/4 swing because you can only swing that far with your shoulders. If you look at the picture above, you can reference the times on a clock to help determine exactly where to take it back. No farther than 8 on a clock.

A Pitch Shot is taking you club back with your shoulders/ arms to 1/4 swing (8 o’clock) all the way to a  3/4 swing (10/11 o’clock).  Basically it is just like a mini version of your full swing, using your shoulders and hips to obtain distance. If you look at the picture above, you can reference the times on a clock to help determine exactly where to take it back.

I can talk about both of these shots for hours and go over many other things, but this is where the process of understanding your short begins. I look forward to posting a lot more blogs on the building of the difference between chipping and pitching.

Back Ball Position

Many people are confused or unsure why a golfer plays a ball back in their stance. I always want my students to know the reason why to do something not just that they are suppose to do it. The main reason to play the ball back in your stance is to produce lower loft. As you can see in my picture, I have taken a 56 degree Sand Wedge and place it back in my stance. Therefore I bring my hands forward and this changes the loft of the club. Now it will act more like a 9 iron or even 8 iron. This is great to use for a chip shot other, basically called a bump and run because you are producing less loft and more run. Remember to make sure you use your shoulders to swing so you keep the club delofted. This ball position is also an excellent choice for a punch shot to get out of trouble….stay tuned to a future blog on just what a punch shot is. It will keep the ball low and produce more roll to ensure you get out of the trouble.  This is definitely something to practice and tryout. More ball position blogs to come to discuss even more options!